Video games today are not only fun, but they’re also fantastic creative outlets for kids to let their imaginations go wild. Much like math and science, designing a video game requires kids to think in different ways as they solve problems and come up with new ideas.
Whether you’re looking for a fun classroom project or something that you can do at home with your own children, here are a few game design exercises, tools, and ideas, to help.
Game Design Exercises for Kids
Game Design Exercise 1: Creating a Video Game Character
Coming up with a character is a great starting point when it comes to designing a game. For this exercise, I recommend creating a worksheet for kids to fill out the information I’ve provided below.
If you’re doing this exercise with younger children, you might consider providing coloring pencils or crayons so they can draw a picture of their character once they’re done.
What, When, and Where, is Your Character?
One of the appeals of video games is how they allow you to visit places and do things that you might never get to do in real life. For this question, encourage kids to think of a time, place, and job that they’re interested in.
The goal is to establish a setting and vocation for a character. If you like, you can create a list with a few ideas to provide them with some inspiration. Here’s a sample list you might use:
-
-
- A futuristic pirate in outer space.
- A medieval knight trapped on a deserted island.
- A detective in a large city in the 1920s.
- A time-traveling submarine pilot.
- A modern-day magician that discovers another realm.
-
What Special Skills or Abilities Does Your Character Posses?
The skills and abilities of a character will translate directly into the game mechanics, so they should be chosen with care. The best video games provide just enough challenge to keep players from becoming bored but are simple enough to keep players from becoming frustrated.
With this in mind, encourage your kids to choose abilities that lend themselves well to balanced gameplay. Here are a few examples of abilities they might choose:
-
-
- Superhuman Strength – This ability could let the character break through walls, lift and throw heavy objects, and jump really high.
- Supergenius – This skill could allow the character to fix and create things throughout the course of a level in order to access new areas and create defense systems.
- Shapeshifting – This ability could give the character the ability to hide from enemies and traverse a level in interesting ways.
-
What is Your Character’s Backstory in One Paragraph?
The goal with this question is to establish a simple backstory for the character. The backstory should explain their job, abilities, and location. At this point, the character should also be given a name.
Here’s a sample backstory for my earlier example of a futuristic pirate in outer space:
Captain Neon Beard was an orphan living near a busy starship port on earth. One day, he stowed away on a starship, and since then he has roamed the galaxies in search of a legendary treasure. He uses his large mechanical peg-leg to enhance his jumping and combat abilities.
What Does Your Character Look Like?
Now that we’ve determined a setting, backstory, and abilities for a character, it’s time to make decisions about their appearance. Their clothing and features should match the setting and time period that’s been selected.
Here’s a list of what you should decide for this step:
-
-
- What is the character wearing?
- What color are their hair, eyes, and skin?
- How long is their hair and how is it worn?
- How tall and built are they?
- What other distinct features do they have
-
Once this exercise has been completed, your kids should now have a basic video game character that they can use as a starting point for conceptualizing their own video game.
Game Design Exercise 2: Conceptualizing a Basic Game Level
For this exercise, we’ll be coming up with the core concepts for 4 part video game level. Before we start making the level, you should first have a clear idea of what your game mechanics are.
Game mechanics are the tools players have been given to help them progress through a game. The challenges in a game should be designed around these tools. A great example of this would be the Portal series.
In Portal, you’re given a tool that can create entry and exit portals on designated surfaces. Using this game mechanic, players must solve puzzles in order to access the next level.
With this example in mind, come up with your own game mechanic. If you’ve completed the first exercise and already have a character with abilities, try using the ability you’ve selected for them to determine your main game mechanic.
Once you’ve settled on a game mechanic, you’re ready to start building your level.
The level will be divided into 4 sections:
Section 1: Introductory Challenge
The introductory challenge is essentially a basic tutorial that gives players the opportunity to learn what tools they have at their disposal.
For this challenge, there should be a clearly defined objective, coupled with clues as to how that objective might be achieved.
To give you an example, let’s say that the objective is for a player to reach a ledge that’s out of reach by simply jumping. However, there is a cube nearby that can be pushed beside the ledge to create a step.
Since the player hasn’t been taught yet that they can move objects by pushing them, we can have the cube sitting in a carved out track that only allows it to be pushed forward or backward. To make it even more clear, we could include scrape marks on the ground to help players put two and two together.
Now it’s your turn. Come up with your first challenge and answer the following questions:
-
-
- What is the clear objective?
- What clues are there for achieving the objective?
-
Once you’ve answered these questions and have helped the player progress, you can move to the next section.
Section 2: Advanced Challenge
Now that players have an idea of what tools they have at their disposal, it’s time to give them something a little more challenging that builds upon what they’ve previously learned.
The easiest way to increase the difficulty level is to increase the number of game mechanics. In my previous example, players learned that they can push a cube to reach new areas.
In the advanced challenge, they might learn that the cube can also be used to hold down pressure plates that can activate doors and other mechanisms, and they can also be used as a wedge between moving objects to prevent them from moving.
The advanced challenge should require players to think logically to figure out the solution based upon what they were taught in the 1st challenge.
As you determine what the challenge is for this section, be sure to answer the two questions we addressed previously:
-
-
- What is the clear objective?
- What clues are there for achieving the objective? (The clue might simply be their experience with the previous challenge.)
-
Section 3: Moderate Challenge
By this point, the player has just completed a more difficult challenge. After players have done something difficult, it’s good to reward them with a breather.
Section 3 should be a fairly easy level for players by repeating some of the elements you’ve introduced them to previously. By allowing them a level to repeat what they’ve just learned, you are reinforcing in their minds that they’re getting the hang of the game, which in turn, boosts their confidence for what’s in store in the next section.
As you’re designing this section, ask yourself:
-
-
- Am I introducing any new concepts or challenges that might prove difficult? (If so, you might want to save them for a future level.)
- Does this level reinforce in players what I’ve taught them in the previous sections?
-
Section 4: Intense Challenge
The last section for our level is the intense challenge. This challenge should require that the player use everything they’ve learned so far while increasing the stakes for them.
For this section, you might introduce a couple of new elements that follow the logic of your gameplay mechanics, but avoid changing things too much. The last challenge is an opportunity for players to master what they’ve learned so far.
Here are a few ideas for how you might make this challenge feel more intense:
-
-
- Put the player on a timer.
- Have the room slowly fill with water.
- Take something away from the player that makes them feel vulnerable.
-
Once you’ve designed your last challenge, the only thing left to do is reward the player. Perhaps they gain a new ability, access to a new area, or an additional life. The main thing is to choose a reward that matches the amount of effort that went into gaining it.
Matching the right reward with the right challenge will keep players engaged and want to continue playing.
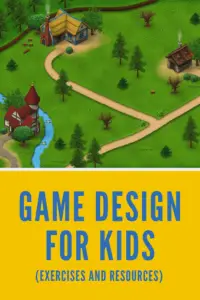
Game Design Exercise 3: Creating a Video Game Level Map
When you’re ready to sit down and begin designing the actual environment of your game, there’s nothing more helpful to have than a video game level map.
Having a good map of a video game level before beginning the creation process will help ensure that the level flows correctly and feels right once it’s done.
Determine Your Sections
If you completed the exercise for conceptualizing a basic game level, you can use what you came up with as the foundation for your level.
The first thing you should do is determine the various sections that make up your level. Here are some examples of sections:
-
-
- A long hallway with navigation puzzle at the end.
- A large room with numerous enemies and lots of cover.
- A stockpile room with resources for the player.
- A small room for a faceoff with one powerful enemy.
- A reward room with a prize for the player.
-
Once you’ve broken up your game into different sections, you can move onto the next step.
Create a Buble Diagram Linking Your Sections Together
Using the sections you’ve decided upon you can now begin linking them together in a logical order, and start playing with the physical layout of the space by means of a bubble diagram.
For this step, you might consider coming up with abbreviations for your different sections so you can create your bubble diagrams faster. Come up with a few different versions of the layout for your level.
Once you’ve landed on one you feel good about, you can move onto the last step.
Create a Detailed Version of What You Determined In You Bubble Diagram
The last step is to take the layout you decided and transcribe it into a more detailed map. In your detailed map, each section should be connected to one another the way that they need to be when the game is being created.
You can use colored pencils, graph paper, or even online software to create the final version of your map. Having a detailed map comes in especially handy if you’re working with a team.
Tools for Teaching Kids Game Design
Today, there are countless tools that can be used to teach kids about video game design. Here are some of my favorites:
-
-
- Minecraft. The basic graphics, simple design, and creative mode of Minecraft make it the perfect tool for helping kids learn about video game design.
- The Little Big Planet Series. The Little Big Planet games by Media Molecule come with a level creator that allows you to make beautiful sidescrolling games in a beginner-friendly way.
- Dreams. Dreams, also created by Media Molecule, expands upon the creation tools they included in Little Big Planet, allowing you to make anything you can imagine using a visual coding system as well as a plethora of other tools.
-
While there are certainly plenty of other tools out there, these are my go-to options for beginners and kids interested in video game design. For more helpful resources about video game creation and design, you can go here.